Patterns: T-Shirts
Patterns using T-shirt yarn cut from old shirts: hot pads, trivets, oven mitts, bath mitts, rugs, hats and bags.
Filter all patterns
·
Sort: Name (A to Z)
Newest first
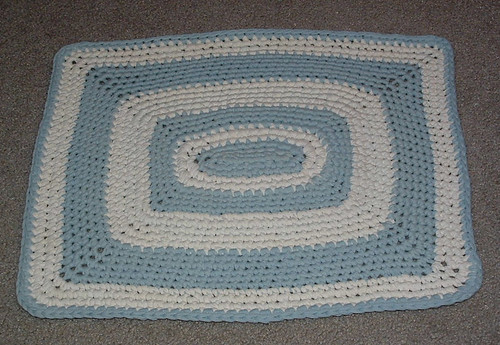
This week’s project is a rug I crocheted from a couple of old white t-shirts and the remaining pieces of a blue jersey sheet. I cut my cotton into 3/4 inch wide strips using my t-yarn making tutorial. Recycling t-shirts and old cotton sheets is a great way to repurpose those old items into new usable rugs, oven mitts, trivets, baby bibs, and more.
Once completed, this t-yarn rug had a problem. The center was not flat and the rug needed blocking badly so this week’s project turned into a two-fold post. A blocking tutorial for t-shirt yarn rugs and the free crochet pattern for the rug.
I didn’t take a photo of the rug before blocking but trust me, the center was all rumpled up and the rug wasn’t laying down flat. I used the same process I did when I blocked a round ripple afghan that was bowl-shaped in the center. My blocking method helped flatten both projects and really saved me a lot of frustration so I wanted to share how I did it. So first I will show how to block a t-shirt yarn rug.
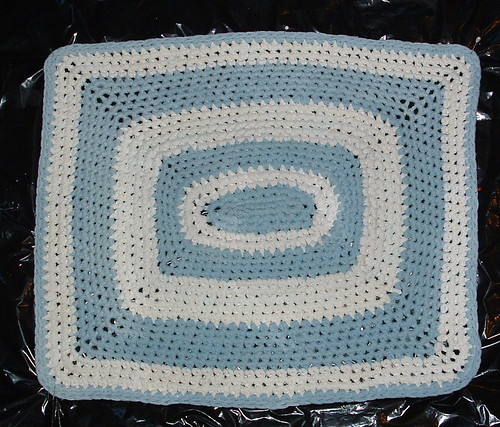
Lay the rug down and stretch it out on a large piece of plastic on the carpet. I used a large trash bag and then just reuse it for the next blocking project. I pin it all around as I stretch the rug and shape it. Use lots of pins and push them down into the carpet to hold the rug in place. Then using a wet rag or wash cloth, press down and wet the rug. Move your cloth around and continue to wet it and as you do, shape and stretch your rug. I laid a wash cloth down as shown and with my hands flat, I move my hands around on top of the cloth. My center was the real problem area so I pressed down and wet this area more as I worked out the rumpled center.
Click on any photo to supersize
Next photo shows after I have been shaping and flattening out the center. Move your pins as needed to get the rug flat and a nice shape. Gently pull on the corners and edges to get it as straight and square as possible. Apply more water on a rag as needed.
Once you have the center flat and the rug shaped, its time to let it dry. I let my rug dry overnight with the pins in place. The next day, I removed the pins and flipped it over gently and let the back dry. The next morning the rug was completely dry and the rug held its shape rather nicely.
Closeup of the t-yarn rug once it was blocked and flatten. As you can see its pretty flat and I can live with how it looks now. I hope you find this t-yarn blocking tutorial useful should you find your rug or other projects need a little flattening.
Below […]

As promised in my last post, here is my crocheted knob pot cover pattern. This project was worked using recycled t-shirts cut into t-yarn or tarn. Tarn is the material created by cutting the t-shirt into a long strip about 3/8″ to 1/2″ wide and then is gently stretched so the tarn curls in on itself. Here is my tutorial for making what I call curled t-yarn.
For those people who would like to crochet this knob cover using rug or chunky yarn, here is a picture of my lid cover crocheted using some black rug yarn. I have included the option for crocheting with rug yarn in the free pattern below.
Depending on your knob size, you may need to adjust your stitches in the crochet pattern posted. The important thing is to check the fit of your cover as you crochet the rounds so your knob cover fits snugly and doesn’t slip off.
I just love my knob cover and use it all the time on my old glass crockpot lid. It is so nice now to just slip the cover over the knob and I can lift the lid without having to worry about it being too hot or slipping out of my hand.
I hope you enjoy this free pattern and want to take this opportunity to say Happy New Year.
Have a wonderful 2010 everyone!
*****************************************************************************************************************************
Crocheted Knob Pot and Lid Cover Pattern
Materials needed:
Small amount of tarn (t-shirt yarn) cut into 3/8-1/2 inches inch wide strips and gently pulled to curl your tarn
Option: Rug yarn or a chunky yarn can be used in place of tarn see pattern changes at the bottom.
Hook: H (5 mm) U.S. size metal crochet hook
Finished knob cover is 1-3/4 inches wide at top and 3 inches wide at base
Rnd 1
Using t-yarn / tarn or rug yarn make a magic circle and Sc 7 times into circle. Do NOT turn your work in this project. Mark so you know where the round starts as you do not join in this project unless specially told to but rather just continue working in rounds.

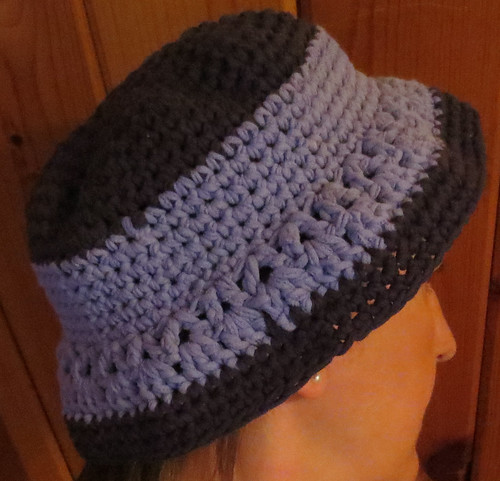
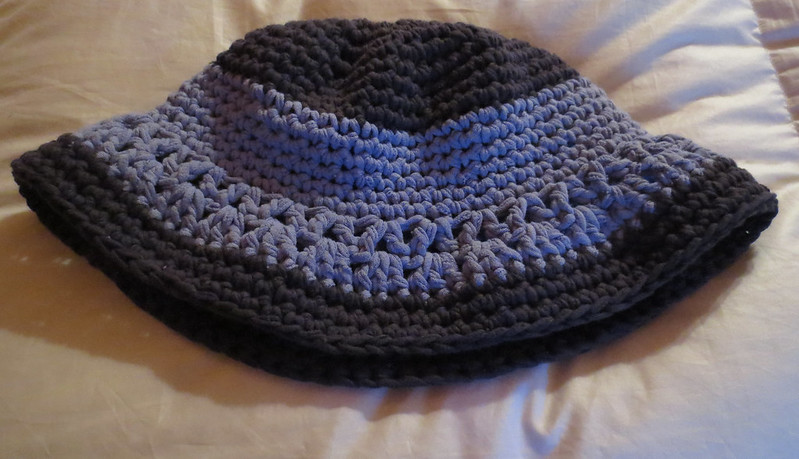
Here is my first attempt at a recycled t-shirt yarn hat. I did a little trial and error to get the hat so it fit comfortably on my head. Here is the finished hat that I crocheted from recycled t-shirt yarn.
Here is a photo of the hat taken flat. It’s a comfortable bucket type hat that could be worn to keep the sun off your head and face while fishing, in the garden or at the beach.
Free T-Yarn Bucket Hat Crochet Pattern
Materials needed:
2) T-shirts cut into 3/8 inch wide strips and gently pulled to curl the t-yarn or tarn in two colors if doing the 2-color hat as shown. Click here for my T-Shirt Yarn making tutorial for recycling old shirts into T-yarn.
Hook: N – 9 mm U.S. size metal crochet hook
Finished measurements:
24 inches head circumference and 7 inches long
Rnd 1
With dark blue t-yarn, work 6 Sc in a magic circle. (6)
August 2, 2013 Comments Off on Crocheted T-Yarn Wash Mitt

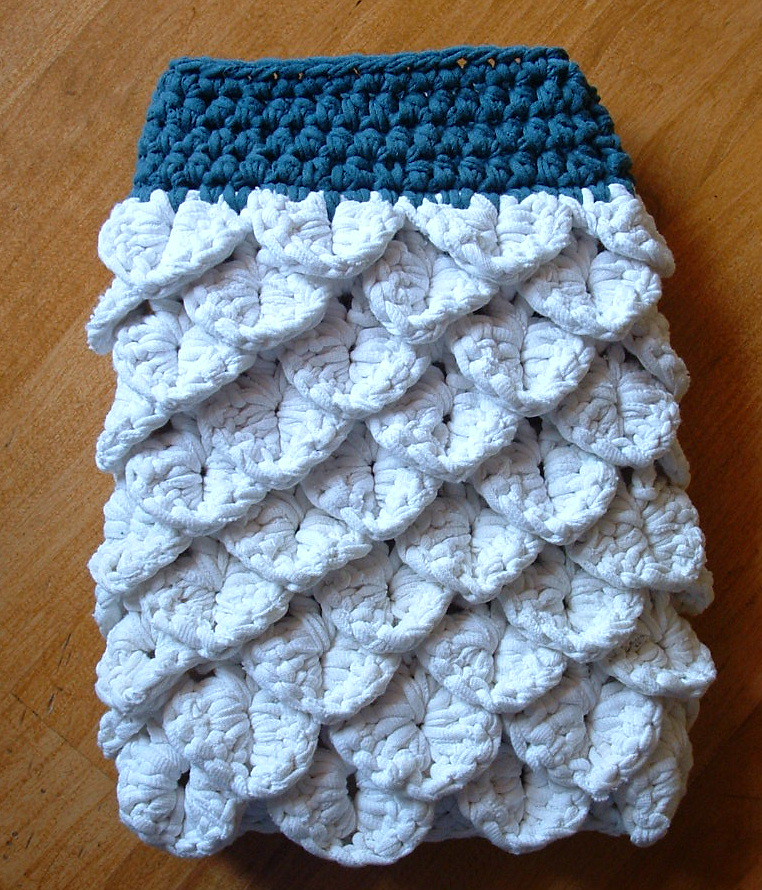
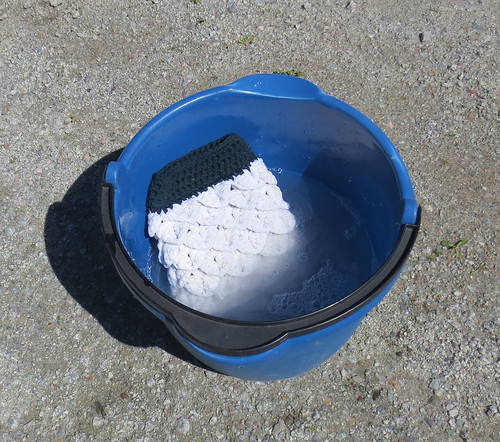
Here is a car wash mitt I crocheted using t-shirt yarn I recycled from several old white tee-shirts. I cut this t-yarn as narrow as I could to crochet this wash mitt. The result is a very thick wash mitt that you can use to scrub the car or other things you may need to clean.
I crocheted the wash mitt using the crocodile oven mitt pattern as the base of the mitt. I changed the cuff portion of the pattern to finish off the wash mitt using a colored t-shirt cut just as thin as possible. Make sure you stretch your t-shirt strips to create curled t-shirt yarn. Crochet the cuff using the colored t-yarn to complete the project.
I hope you enjoy this free crochet pattern and make yourself a cool recycled wash mitt from your old tee-shirts.
Crocodile Stitch Wash Mitt Pattern
J (6 mm) hook
Materials:
T-shirt yarn cut 1/4 inch wide (about 2 white tee-shirts)
Small amount of a contrasting color for the cuff (1/3 of a colored tee-shirt)
Finished crocheted wash mitt measures 7 inches wide by 9 inches long. The cuff portion is 1-3/4 inches long with a 4-1/4 inch wide opening.
Special Stitch:
Crocodile Scale Stitch: Dc 5 stitches down first post of the 2-Dc base set, Ch 1, and then work 5 Dc up the 2nd Dc of the 2-Dc set.
Directions:
With J hook and t-yarn, Ch 42.

Here is my first curled T-shirt yarn or T-yarn project. Curled T-yarn is created by cutting an old recycled tee-shirt into strips and then stretching the strip so it curls in on itself. This creates a circular-type yarn from the t-shirt strip. Here is my picture tutorial on how I make recycled curled T-shirt yarn. My finished project is done in a basic motif granny stitch pattern. This trivet hotpad is not only very frugal as it didn’t cost me anything, it’s also an excellent way to upcycle old tee-shirts into a new cool reusable item.
All photos are clickable to supersize them
Here is a closeup of the T-yarn once its cut and stretched.
Free T-Yarn Motif Hotpad Crochet Pattern
Materials needed:
One large t-shirt without side seams (blue) – Cut and stretched into approx. 65 yards of T-yarn
Small amount of contrasting T-Yarn (white)
Hook: J U.S. size metal crochet hook
Finished Hotpad Trivet: 7 inches wide
With center color Ch 4, Sl St to form ring.

I love crocheting with recycled t-shirts. I cut this t-shirt into 1/4 inch strips and curled it as shown in my tutorial for curled t-yarn or tarn. I was inspired by the diagonal dishcloth pattern when I crocheted this baby bib. I had to frog the bib several times to get the size and shape right but I think the finished bib turned out pretty good. I cut the bottom hem off the t-shirt and used it for the two tie straps for the baby bib. You could also crochet your tie straps if you’d rather but I like using the hem strips as they are stretchy and already sewn for you.
I’m not sure why the bib looks red but it’s really pink. I think my camera is getting old and color blind — lol. Anyway here is my t-shirt yarn ball before I started which shows the pink color better.
This bib was crocheted for my little granddaughter. She’s four months old now and this should fit her nicely. It’s of course very washable and durable as it’s made completely from a recycled cotton t-shirt. The best part is that this baby bib was free making it a very frugal and green crafting project at the same time!
Free Pattern for Crocheted Diagonal T-Yarn Baby Bib
Materials needed:
One pink t-shirt cut into 1/4″ wide strip and stretched to curl into t-yarn approx. 110 yards
Cut two 14″ long strips using the t-shirt hem and stitch ends closed
Hook:
H (5 mm) USA size crochet hook
Description:
Baby Bib measures 9″ across and 8″ long from neck edge to bottom center
Straps are each 14″ long
Directions:
Ch 14
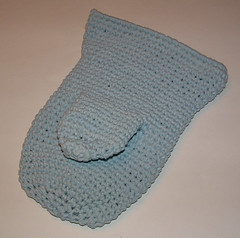
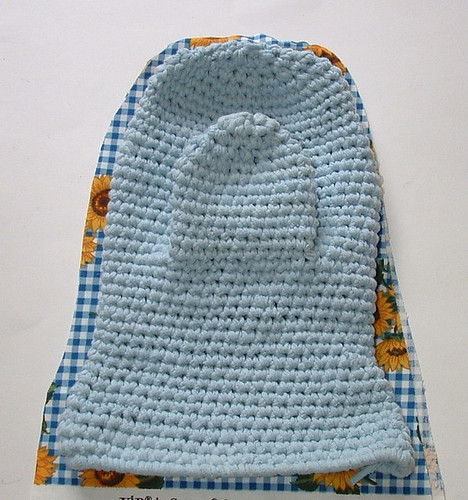
A few weeks ago I shared my crocheted oven mitt project that I made from a recycled cotton bed sheet. At that time I hadn’t been able to line the oven mitt but I just got the lining done and wanted to present the photo tutorial.
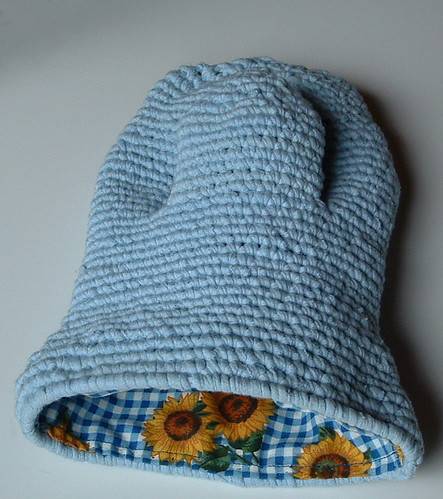
Here is my finished product with the lining sewn inside the t-yarn oven mitt. This lining project would work for any crocheted or knitted oven mitt.
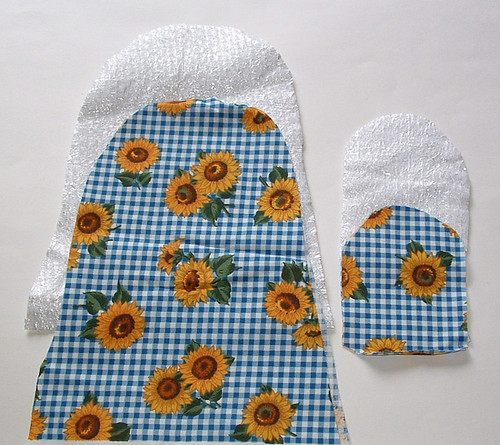
The first step in this lining project is to lay out and cut your lining fabric and heat protection material. I used some scrap fabric that I had on hand along with a piece of Insul-Bright insulation material. Insul-Bright is an inexpensive material that provides heat protection and is designed for use in oven mitt and potholder projects. You just need enough fabric to cut out two oven mitt shapes and one shape from the insulation material. You need to cut out two thumbs from the printed lining fabric and the insulation material.
Next step is to

This is a tutorial on how to make T-yarn from old recycled tee-shirts. T-yarn maybe a new term to you. T-yarn or Tarn is what the yarn is being called that is made from cutting t-shirts into strips for crafting.
The best t-shirts are ones that do not have side seams as you can cut around and around starting at the bottom. First cut off the hem and then with a sharp pair of scissors cut strips about 1/2″ to 3/4″ wide. Cut in one continuous strip as I have shown here.
All photos are clickable to supersize them
I stopped at the armhole openings as this was the end of my continuous strip that is completely one piece cut in rounds. You can cut off the sleeves and start another continuous strip at this point but it’s not as smooth as the main body because you will have curves in your strip where you have to turn the corners.
To create the circular T-yarn, you gently pull on the strip. I found the best way to do this is by taking a short length about 1-2 feet long and stretching it. The stretching causes the tee-shirt strip to turn in on itself thus creating your rounded T-yarn. One important warning is not to pull too hard otherwise the strip breaks. I did have this happen on my first attempts so be advised to gently pull on the strip until it won’t stretch any further. Then you move to the next section of your strand and stretch it again. Continue stretching your strip until the whole long continuous strand has been stretched and is curled as shown in the photo.
Click to supersize
Here is a small sample of what the curled T-yarn looks like when you crochet with it. It’s smooth to work with and has a nice finished look. You can either crochet or knit with the recycled yarn that has been created. This circular T-yarn would make excellent potholders, trivets and of course is perfect for a recycled tote bag. One large tee-shirt netted about 90 yards of T-yarn once stretched. So grab your crochet hook or knitting needles and experiment with this recycled material to create some wonderful eco craft projects.

Need a new bathmat? How about making one from your old t-shirts. I share with you all my recycled t-shirt bathmat rug. I crocheted this bathmat during a RAL (Rug A-Long) over at the Trash to Treasures group on Ravelry. If you are member of Ravelry, you should check out our group. It’s a fun bunch of people who love to create cool stuff using what some may call trash.
Anyway I crocheted this using about 3 different shirts and wanted a half circle rug to place in front of my shower. I had to rework my rug several times to get the shape right. Please keep in mind that you may have to add or subtract a stitch or two here and there to get your rug to lay down flat and to have the half circle shape. Remember that crafting with recycled materials is never an exact science so my patterns should be used as a guideline to help you create your own finished projects.
If you are new to crocheting or knitting with recycled t-shirts, you can learn the process by using my curled t-yarn tutorial. Enjoy this tarn rug project and happy recycled crafting to all!
Free Pattern for Crocheted T-Yarn Bathmat Rug
Materials needed:
3) t-shirts cut into 1/4 inch wide strip and stretched to curl into T-yarn
Hook:
N (9 mm) USA size aluminum crochet hook
Description:
Bathmat rug is 27″ tip to tip and 13-1/2″ wide at middle
Directions:
Row 1
Make magic circle and work 7 Dc in circle.








Recent Comments