Patterns: Baby / Children
Free patterns for babies and little ones: bibs, hats, booties, buntings and sweaters. Many are made from soft cotton yarn or T-shirt yarn, and a few use recycled denim.
Filter all patterns
·
Sort: Name (A to Z)
Newest first

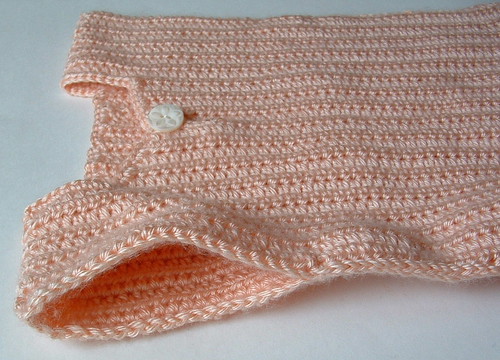
I present my crocheted toddler sweater vest shell. I have named this project the Ana Sweater Shell in honor of my sweet Granddaughter who this sweater was created for. The sweater is worked from the sides rather than from top to bottom as is with most crochet patterns. Because it worked with the stitching running up and down, it provides a unique and easy to finish crochet project.
I first saw this idea from a sweater shell that Guro crocheted over at her blog but she did not have a pattern written up. Well after checking with Guro, she said to just go ahead and feel free to be inspired by her project so this is my results. I worked my vest shell in half-double crochet stitching while hers was done in single crochet.
I really love this sweater as it is so versatile. It can be worn as a vest over a t-shirt or blouse and it can also be worn as a shell alone in warmer temperatures.
Click to Super-Size
My vest shell is about a children’s size 3 and should fit a toddler who is around 2 years old. It has a longer body so it’s a nice length for a toddler. The vest fits my Granddaughter who is 15 months old. The pattern has been written up and while I have not tested it, I believe it’s pretty solid but please email me if you have any questions or find any errors in my free crochet pattern below.
___________________________________________________________________________________________
Crocheted Toddler Vest or Shell Sweater Pattern
Finished toddler vest measures: 12 inches wide by 14 inches long
Size: Children size 2-3
Hook: Metal G (4-4.25 mm) US sized crochet hook
Materials:
6 ozs Caron Simply Soft Yarn in Lt. Country Peach
(315 yards/288 meters of 4-ply worst weight yarn)
1 inch Button for front closure
Row 1 (Back piece)
Ch 57

I have been crocheting purple baby hats for the PURPLE baby crying awareness campaign. PURPLE Crying is a program to help parents, caregivers and others understand this normal increased crying in healthy infants and prevent abuse such as shaken baby syndrome.
Details for the hat drive can be found here. They do ask that the hats be at least 50% purple in color and be simple with no straps or hanging pom poms etc.
Here is the baby size hat pattern that I adapted from the adult crochet hat pattern for this project. I have options in the pattern directions below for a 3-month old baby, newborn, and a preemie sized hat.
Enjoy the free crochet pattern and I hope you will support this is very important baby awareness campaign by crocheting or knitting a purple hat.
Baby Striped and Ribbed Band Hat Pattern
Finished baby ribbed hat measures:
3-month old = 14 inch circumference by 6 inches long with WW yarn
Newborn = 13″ cir by 5-1/2″ long with WW yarn
Preemie = 11″ cir by 4-1/2″ long with Aran yarn
Hooks:
H (5 mm) US sized crochet hook for 3-month baby
G (4 mm) US sized crochet hook for newborn and preemie babies
Changes for preemie size baby hat shown in italicized text below.
Materials: 1 ounce Worsted Medium Weight or Aran Yarn
(1 oz of yarn for solid color and 1/2 oz of contrasting yarn for stripes)
With main yarn color, Ch 3 and join to form ring. Hat pattern is worked in the round without turning.
Rnd 1
Ch 2, work 11 Hdc in ring and join to beg Ch-2. (12)
(Ch-2 counts as first Hdc st.)
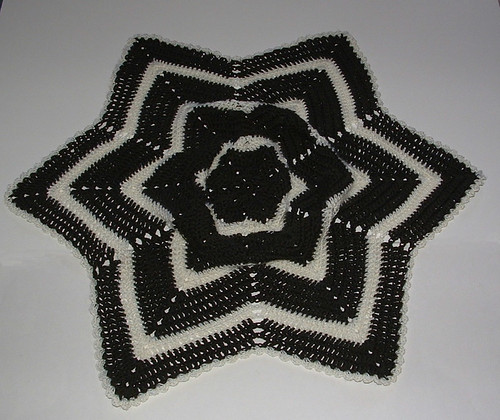
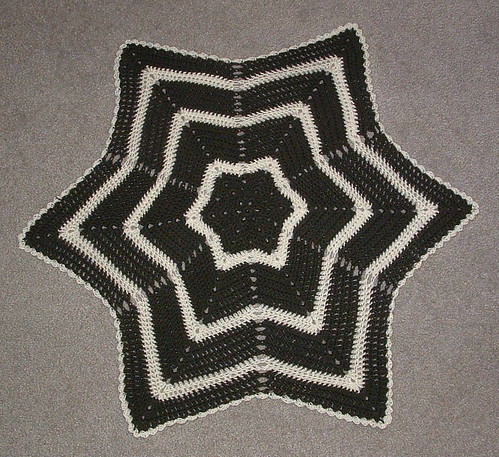
I recently crocheted a six point round ripple and the center was bowl-shaped. So I looked around for a picture tutorial on how I might block the crocheted afghan. I haven’t tried blocking an afghan before as usually they lay flat but this one had an issue and I was so hoping that I could straighten it out by blocking it.
After looking around the Internet, I read several different tips on how I might do the blocking but nothing with photos. Well as I’m a visual type person, I wanted photos with step-by-step instructions. After reading a few ideas, I set out on my own and created my own picture tutorial for blocking my rumpled-up afghan.
Here is my round ripple baby afghan before blocking. As you may see, the center is all rumped up and isn’t laying flat at all.
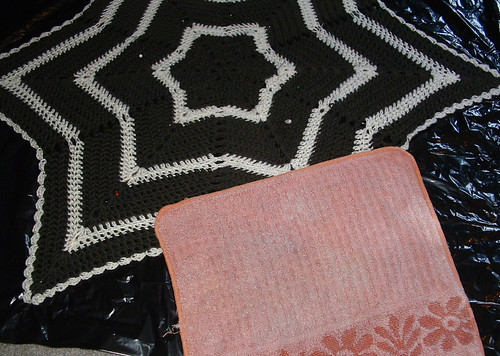
I put down a plastic garbage bag on the carpet and then placed my afghan on it. I gently stretched the points and center and then pinned it down into the carpet to flatten it. Put your pins in at an angle to hold down your blanket as you stretch it. Push down on the center to flatten it further and move your pins to stretch the afghan until it is laying down as flat as you can get it.
Next dampen your afghan with a wet cloth or use a spray bottle to gently wet the material. With the cloth or your hand, flatten the center down and move the pins as needed to stretch the blanket flat. Move the wet cloth around as shown to moisten the yarn so it blocks evenly.
After dampening and flattening your afghan, allow it to dry completely before removing the pins and moving the blanket off the plastic. The next day my blanket was dry so I removed all the pins and the blocking was very successful as this baby afghan is relatively flat and looks much better now.
I hope you find this blocking tutorial useful. Blocking can be a great way to fix those round ripple and star afghans that just don’t like to lay flat after you finish them. Take heart and try my blocking tutorial to fix your projects should you need a little flattening.

I have several skeins of this pretty fun fur that I picked up for 99 cents at my local Dollar Store. If you have ever worked with fun fur you know it can be challenging to find your stitches and difficult to use. I decided I would try this novelty yarn to crocheted a child’s size ear warmer. After practicing with the yarn, I found I could easily work a single crochet stitch to make a simple headband.
I crocheted one ear warmer in a toddler size and also a larger one to fit a child 4-6 years old. Both headbands are 2-1/2 inches wide.
Head circumference for a toddler 1-3 years old is about 18-20 inches. Children 3-8 years old have a head circumference from 18- 20-1/2 inches.
The toddler size headband was crocheted to 15-1/2 inches long before joining the ends together. This should comfortably fit a 2-3 year old as the fun fur yarn is stretchy. The larger child’s size was crocheted to 17 inches long before joining. This should fit a child 4-6 years old with the yarn stretching.
One nice thing about the fun fur is when you join the ends to create the headband and you can’t even see the seam.
Child’s Ear Warmer Headband Pattern
Hook: H (5 mm) crochet hook
Materials: 1/2 skein (25 grams) Novelty Fun Fur
Ch 8 with fun fur yarn. Turn and single crochet (Sc) into the 2nd chain from the hook and in each stitch across. (7 Sc = 2-1/2 inches wide)
Ch 1, turn and Sc in each stitch across. (7)

I was asked recently for a round toy ball pattern. Well ask and you share receive. In an effort to continually make this blog a comprehensive library of free patterns using recycled materials, here is my free crocheted toy plarn ball project.
My recycled plastic toy ball has a 5 inch diameter and reminds me of a nerf ball as it’s soft. It would be a great toy for a child or a play toy for a pet. It also is a wonderful way to use up those little scrap pieces of plastic bags that you have leftover when you create your plarn. You can use the handles and end pieces to stuff your toy plarn ball.
This is a simple pattern but I had to re-work it four times to get it round. Who says creating patterns is easy — LOL. This toy ball is worked all in one piece and my final product is pretty round. You could probably easily adapt the crochet pattern to make it a smaller or larger ball as desired.
Please enjoy the pattern and you can find a list of all my free recycled craft patterns here.
Free Crocheted Round Plarn Toy Ball Pattern
Materials needed:
*Plastic bags cut into strips 1 inch wide and interlocked to create plarn. (Approx. 12 plastic bags)
The tutorial on how to create yarn from plastic bags can be found here.
*Scraps of plastic bags for ball stuffing.
Hook:
J (6 mm)size metal crochet hook
Description:
Recycled Plastic Toy Ball – 5 inch diameter
Directions:
Using plastic bags cut into plarn, Ch 4 and join with a Sl St to form a ring.

Here is a crocheted arm sling project I create for my 5 year old granddaughter who broke her arm. I looked around and couldn’t find a pattern so just started out winging it in an effort to come up with something that would work and support her arm. As she broke bones in both upper and lower right arm, the cast is heavy and the sling needed to be comfortable to wear with a wide strap around the neck and shoulder.
I have written up the crochet directions for this arm sling but I want to warn everyone that it’s only a guideline. You want to make sure what length you need the arm portion and the strap length before you cut off any yarn. I left my yarn attached for the shoulder strap as I had to rework it several times when I actually was able to have a fitting with my granddaughter. Also because yarn stretches I had to shorten the length by several inches on the strap to get the right drop for the crocheted sling. So just make sure you check the fit before finalizing your arm sling. But this should provide people with a pattern to help crochet your arm sling.
Arm Sling Pattern
Materials:
3-4 ozs Red Heart Worst Weight Yarn (pink)
Buckle (1 to 1-1/2″ wide)
Hook: H (5 mm) crochet hook
Description:
Arm Sling:
10-1/2″ long from elbow to wrist by 5-1/2″ tall with 10 – 14″ strap.
Strap at shoulder is 5 inches wide and then 1-1/2″ wide at buckle.
Row 1
Ch 39, Sc in 2nd ch from hook and in each st. (38)

Here are some ribbed band hats I crocheted in several shades of yarn in child sizes. Here is a pretty colorful wool hat I crocheted with a ribbed band. I used my ribbed band hat pattern but only worked even on 58 stitches as of round 5 for a child’s size with a 5 mm (H) crochet hook. This resulted in a finished size of 17 inch Cir at band edge and 8 inches long that fit a 2 year old girl just fine.
Here is a closeup of the ribbing on the hat band with full pattern details below.

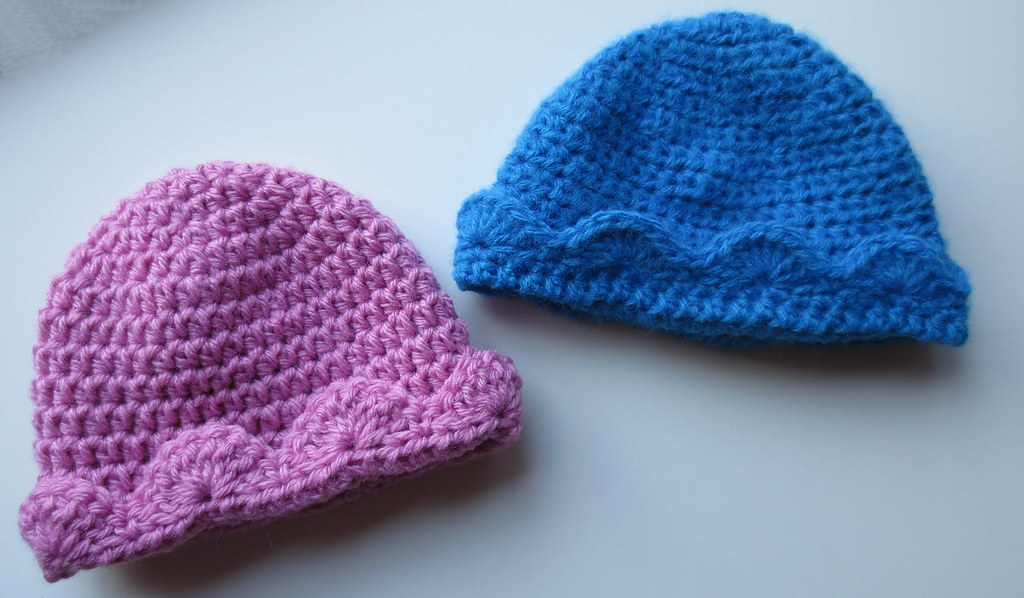
A friend at Ravelry shared this pretty crocheted scalloped hat edging. It just looked so nice on the baby hat she crocheted that I wanted to try it.
You can use any baby or child’s hat pattern you have and just add this crocheted scalloped edging to the beanie once it’s finished. The pink and blue baby hats were crocheted using a basic beanie pattern. I then added the edging to both. The only difference is that the blue hat has a round of single crochet stitching around it before I added the scallop edging round.
Scalloped Edging:
Turn, Sc in back loops only working on the inside of the hat so the scallops face out when folded to the outside of finished hat.
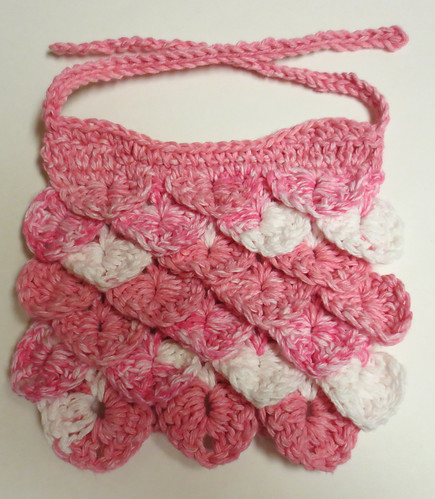
One of my goals this year was to learn the crocodile stitch. I watched several you-tube videos on the stitch and while there are a few different variations, the stitch is generally crocheted the same. Some people work a chain stitch between scales and others end the rows a little differently.
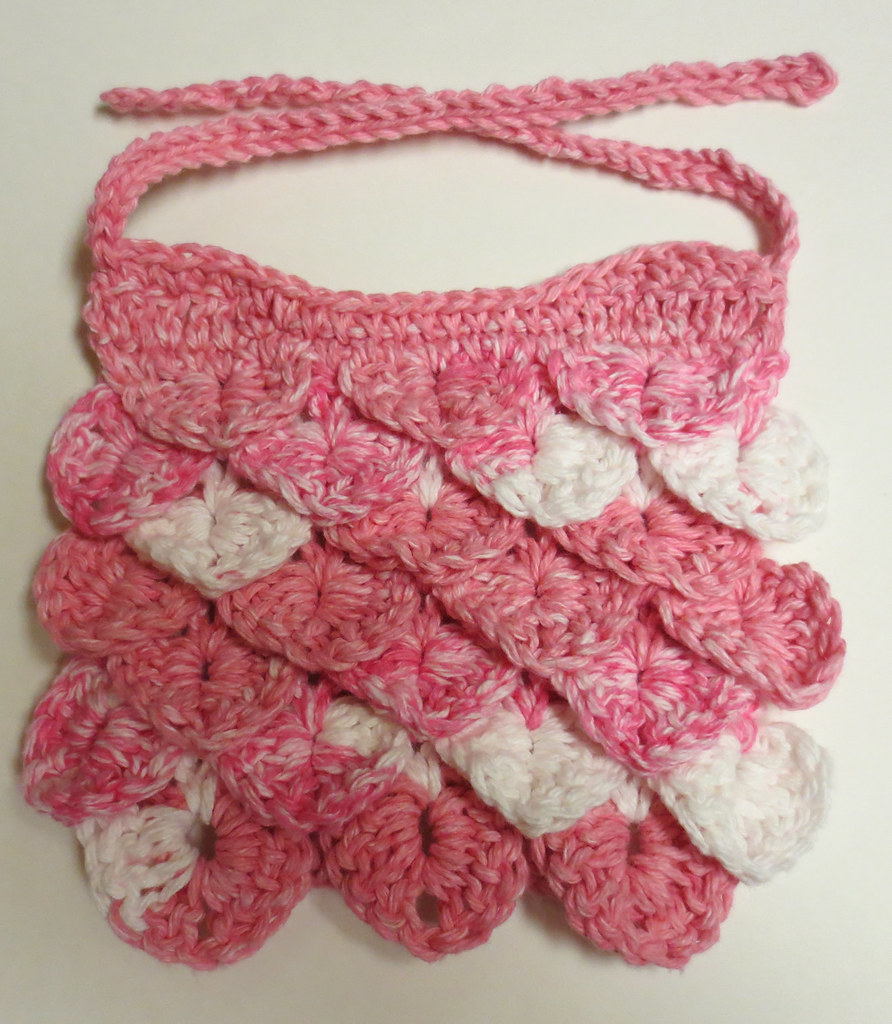
Here is a quick and simple little crocheted baby bib pattern I came up with using the crocodile stitch. If you are learning this stitch for the first time, you may find this instructional post and video helpful as you learn the stitch. The crocodile stitch is easy once you get the hang of working the base rows and scale rows. I hope you enjoy crocheting the baby bib pattern and working the crocodile stitch.
Crocodile Baby Bib Pattern
I (5.5 mm) hook and H (5 mm) hook for edging
1-3/4 oz / 80 yards of Cotton Yarn (Sugar’n Cream Pinky Stripes used)
Baby bib measures 7 inches wide x 7 inches long with 9 inch ties.
Directions:
Row 1
With I hook, Ch 18 loosely. Dc in 3rd chain from hook.
*Ch 2, Skip 2 Ch, 2 Dc* repeat until the end of the chain. (6 2-Dc sets)







Recent Comments