Patterns: Kitchen / Bath
Dishcloths, pot scrubbers, potholders, oven mitts, towel toppers and bag holders for the kitchen and bathroom, in cotton yarn, plarn and T-shirt yarn.
Filter all patterns
·
Sort: Name (A to Z)
Newest first
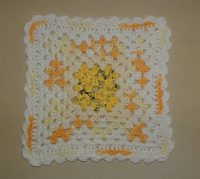
Happy 4th of July! I love handmade dishcloths and even better are ones that have center scrubbers. Just in time for the big Summer holiday, here is my latest “Sunshine” dishcloth I crocheted with a center scrubbie made from recycled plastic bags.
Here is another variation using scraps I had leftover and is one round less than the original pattern as I ran short of materials.
Click to view full-size
These dishcloths with center scrubbies are very durable and handy for cleaning your dishes. Here is a picture tutorial on how use plastic bags to create plastic bag yarn or plarn. This is a great way to use up scrap cotton yarn and also re-purpose those unique colored plastic bags as you only need a small amount of plarn for the centers. Here is the free pattern for everyone to enjoy this fun recycled green craft project.
******************************************************************************
Sunshine Dishcloth with Scrubbie Pattern
Dishcloth measures: 9 inch Square
Hook: Metal H (5 mm) US sized hook
Materials:
1-1/2 ozs. of Cotton yarn – variegated yellows
Small amount of white Cotton yarn
Small amount of plastic bag plarn for scrubber center –
white (1 bag) and yellow bags (2 bags needed)
Option: This pattern can be worked all in cotton if you’d rather.
Allow about 2 ozs. of cotton for project.
With center color (white plarn shown) Ch 4, Sl St to form ring.

Need a new trivet hotpad? Well grab that old t-shirt and start cutting. This cute flower hotpad was crocheted from the front piece of an old cotton tank top of mine. This particular tank top had side seams so I cut it across from side to side so I could stretch it to created what I call curled t-yarn. Here is my picture tutorial on how to make curled t-yarn.
The nice thing about these trivets is that they are a quick project and only require about 40 yards of t-yarn. Because this was a shirt with side seams, when I reached the side, I just cut at a diagonal to turn so I could work across the front again. Little “tags” are created when you make the turns but can be trimmed once you curl the t-yarn and can be easily hidden within your stitches or at the back of your work. As you can see, all my little tags don’t show. Anyway enjoy this recycled t-shirt project and happy green crafting to all!
Free Crochet Pattern for a T-Yarn Flower Trivet Hotpad
Materials needed:
One-half of a T-shirt – approx. 40 yards of t-yarn
Cut into 1/4 inch – 1/2 inch wide strips and gently pull to curl your t-yarn
Hook: J (6 mm) size metal crochet hook
Finished Trivet Hotpad is 6-1/4 inches wide
Rnd 1
Make a magic circle with t-yarn, work 14 Dc in circle. Join with Sl St to top of 1st Dc to complete first round. Do not turn your work in this project.
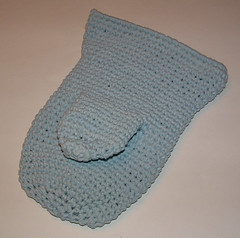
I think most people know the yarn you can create from recycling old t-shirts is called t-yarn or tarn. But did you know that you can also recycle old cotton jersey sheets to make the same type of material?
I recycled an old cotton sheet to create this crocheted oven mitt. I cut the sheet into very thin strips and curled it as outlined in t-yarn making tutorial. I used half a twin sheet which is probably less than two t-shirts should be using tees to make your oven mitt.
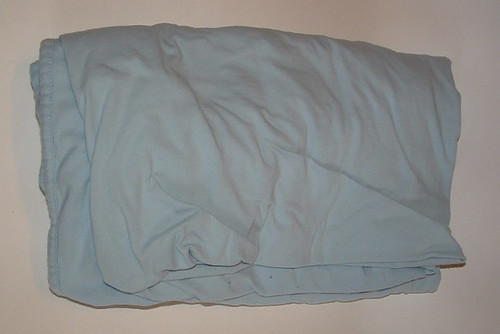
Here is my cotton sheet before I started. I was lucky to get it free from the rag box at my local thrift store as it had a few holes and some minor discoloration. As you cut the strips you can work around any holes and the color differences really don’t show in the yarn that is created.
This recycled oven mitt project fits a woman’s size medium hand. Should you need a larger mitt, just do a few more rounds as indicated in the crochet pattern below. As always, I hope you enjoy my free pattern and have fun creating your own t-yarn oven mitt.
****************************************************************************************************************************
Free T-Yarn Oven Mitt Pattern
Materials needed:
About half a twin jersey sheet or a couple of t -shirts cut into 3/8 inch wide strips and
gently pulled to curl your t-yarn or tarn
Fabric for the lining and one piece of insul-bright for heat protection
Hook: H (5 mm) U.S. size metal crochet hook
Size:
Woman’s medium sized hand
Finished Oven Mitt: 6″ wide x 10-1/2″ long with 7-1/2″ opening
Using t-yarn, Ch 44 and join with a Sl St to form a ring. My ring was approx. 7 inches wide if measured flat.
Rnd 1
Sc around the entire chain as you work along the ring. This allows you to slide the sts as needed
to get a smooth band around the ring. Join with a Sl St into beg Sc. (Approx 50 Sc)
Do NOT turn your work in this project. This project is worked in rounds.

This recycled craft project was created by me out of necessity. I needed a pot handle cover for my old cast iron skillet. The handle gets hot and I wanted a sleeve type cover that I could just leave on the skillet. Well I grabbed some curled t-yarn or tarn and started crocheting. Here are my two finished t-yarn skillet covers.
Maybe you haven’t heard about t-yarn yet. Well it’s yarn you create from old recycled t-shirts. You take the t-shirts and cut them into long continuous strips. I then stretch it which causes the t-yarn to curl in on itself. Here is a picture tutorial if you’d like to make your own t-yarn.
The nice thing about t-yarn or tarn is that it stretches and fits snugly on my skillet handle. I also wanted to make one using regular rug so I crocheted this handle cover using some thrift store black rug yarn.
So whether you’d like to crochet your handle cover using recycled materials or regular yarn, here is the free pattern and details below. This pattern is easily adaptable for pots and skillets of different sizes. It’s a very easy pattern with simple stitches that works up quickly. So what are you waiting for — Grab your hook and crochet!
Free Crocheted Pot Handle Cover Pattern
Finished handle cover shown is 5″ long and 1-3/4 to 2″ wide
Materials:
1 oz) T-yarn cut about 1/2″ wide and stretched or chunky rug yarn
Hook: J (6 mm) crochet hook
Rnd 1
Using T-yarn or regular yarn, ch 10 and join with Sl St to form a ring.
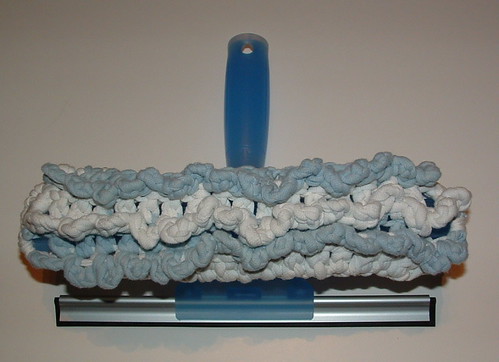
Need a swiffer duster sock? Well I did for my Unger so I cut up one white t-shirt and a small amount of a blue jersey sheet to crochet my duster cover. I cut my t-yarn 1 inch wide and stretched it gently as shown in my t-yarn making tutorial.
My Unger is a squeegee with a swiffer-like head on the other side. I want to be able to use the other side to dust and clean high areas in my house with the extended handle on the Unger.
I used the Craftstylish crochet reversible swiffer pattern as a basis for my duster cover. Because my tool is narrower than a Swiffer, I had to modify the original pattern. The beauty of the pattern is that it is easily adjustable to fit different sized cleaning tools. The pattern has great pictures and works up really quickly.
Okay now for my modifications:
I used N (9 mm) crochet hook. I chained 19 to begin my cover. I only crocheted 3 rows of ruffles in the middle. Then one round of SC in each stitch and then several decreases of Sc on last round to fit my Unger.
Finished size: Fits a tool head 10 inches long and 1-1/2 inches wide when stretched.
My finished t-yarn cover turned out perfect and I love the ruffles on the duster. It works great and I plan to use the same ruffle design to make a mop cover. Using recycled t-shirts for this project worked wonderfully as the cotton is soft and absorbent. Now I just need to get busy and do some cleaning with my new tool.

Recycling thrift store sweaters is a great way to reclaim some nice yarn at a reasonable price. I recently picked up this mohair blend sweater from my local thrift store with high hopes to unravel the yarn. Well I soon found out that this sweater didn’t want to unravel and appears to be an interlocked knit.
I put on my thinking cap in an effort to upcycle this old sweater into some new and useful items. First I used the lower portion of the sweater to create a scarf cowl. Using some scrap yarn, I added two rows of single crochet along the lower edges to finish off the raw edges where the sweater body had been attached. My upcycled cowl was finished off with some wooden buttons from my stash.
Next I tackled using the sleeve as a plastic bag holder. The natural cuff on the sweater was perfect for transforming the sleeve into a handy bag keeper. As shown in the pictures, I folded under the top of the sleeve to the inside. Using a basting stitch, I sewed around the top edge about 1 inch from the top to create a casing for the ribbon tie closure. I machine stitched the basting to hold the fold in place and also so I could crochet in a straight line to create my casing. I left the back of the casing open where the sleeve seam is. Then using a small D crochet hook and some scrap brown yarn, I worked a slip stitch over the basting and through both layers to create my casing for the ribbon tie closure. See photos below and you can click on any other them to enlarge the pictures.
I added a hook hanger at the back by chaining the length I wanted and then worked back down the chain by working a single crochet stitch around the chain and attached both ends into the back of the bag keeper. I threaded a piece of ribbon through the casing and tied it at the back with a bow to complete the plastic bag keeper. I present the upcycled thrift store sleeve which has been transformed into a plastic bag holder.

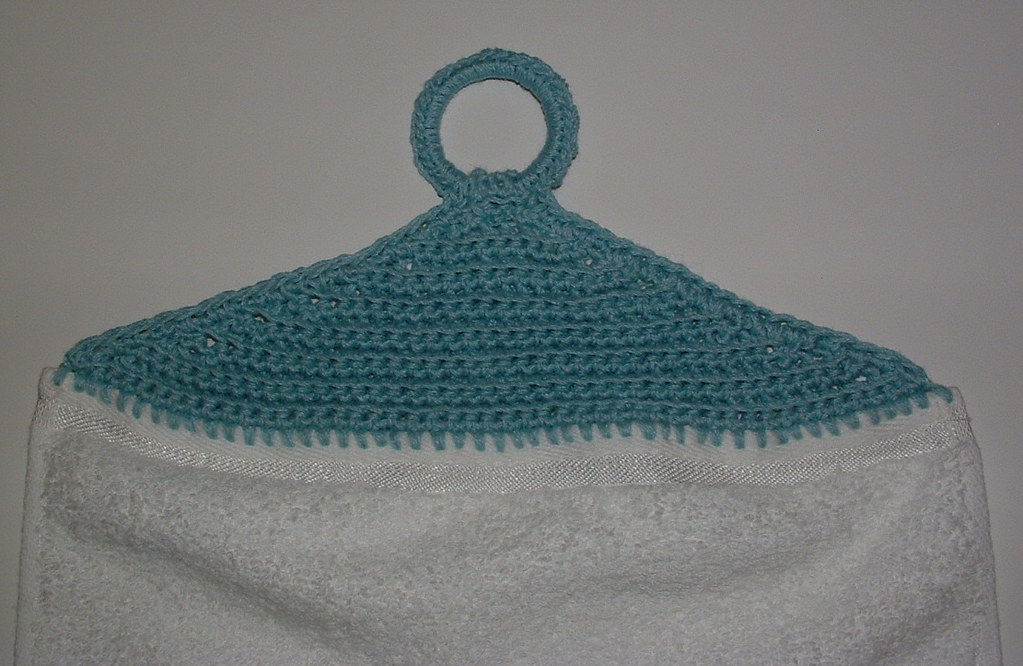
My triangle towel topper uses a finger towel and a recycled plastic milk jug ring for a hanger. I really like the idea of the round ring as you can hang up the towel on a cabinet knob or hang it up over a hook. It works up very quickly and I made the first one using less than an ounce of thrift store sport cotton. This one had 48 stitches along the top as the yarn was thinner.
Here is a closeup of the finished top. You can click on the photo to supersize it.
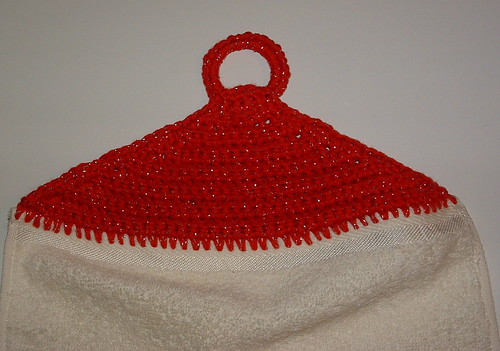
When I made the red triangle towel topper, I used regular cotton weight yarn. It’s Bernat Christmas Sparkle.
Because the red triangle towel topper is a thicker weight yarn, it has 44 stitches across the top edge of the towel to start. But don’t worry about the number of stitches across the top, just do your single crochet stitches evenly along the top edge. You can always adjust your stitches as needed as you work your topper. I did one extra row for the flap on the red topper. With 4 rows, the turning flap was a bit longer but you can do just 3 rows if that works for you like I did with the sport weight yarn on the blue triangle towel topper.
I used Christmas finger towels for this project but you can use towels of different widths or lengths. Just adjust your stitches as needed to end with a 4-stitch wide flap for the fold over the plastic ring. I used plastic milk jug rings but you can also use recycled juice or other round rings for this project. Make sure you crochet lots of stitches around the plastic ring to cover it entirely with the yarn. I found this gives the project a nice look and no one with ever know that you used an old plastic jug ring for your crochet project.
As always please enjoy the free pattern below and happy crocheting to all!
Crocheted Triangle Ring Towel Topper
Materials needed:
Finger towel – 10 inches wide by 16 inches long used
Plastic milk jug ring 1-1/2″ wide
1 oz. Cotton yarn
Finished topper: 10″ wide & 5″ long from top of ring to towel top edge
Hooks:
#7 Steel crochet hook
G (4-4.25 mm) crochet hook
Directions:
Because finger towels are shorter, there is no cutting or sewing necessary to begin your base row. You will use the steel hook to poke the first hole into the right side corner and pull the yarn through the hole. Then use the G hook to complete your first Sc st. Then move onto the next hole until you have worked completely across the base row evenly with your stitching. Once you have the base row done, you will only be crocheting with the G hook.
Row 1
Using the steel crochet hook as explained above to poke holes, Sc evenly along the top edge of towel.

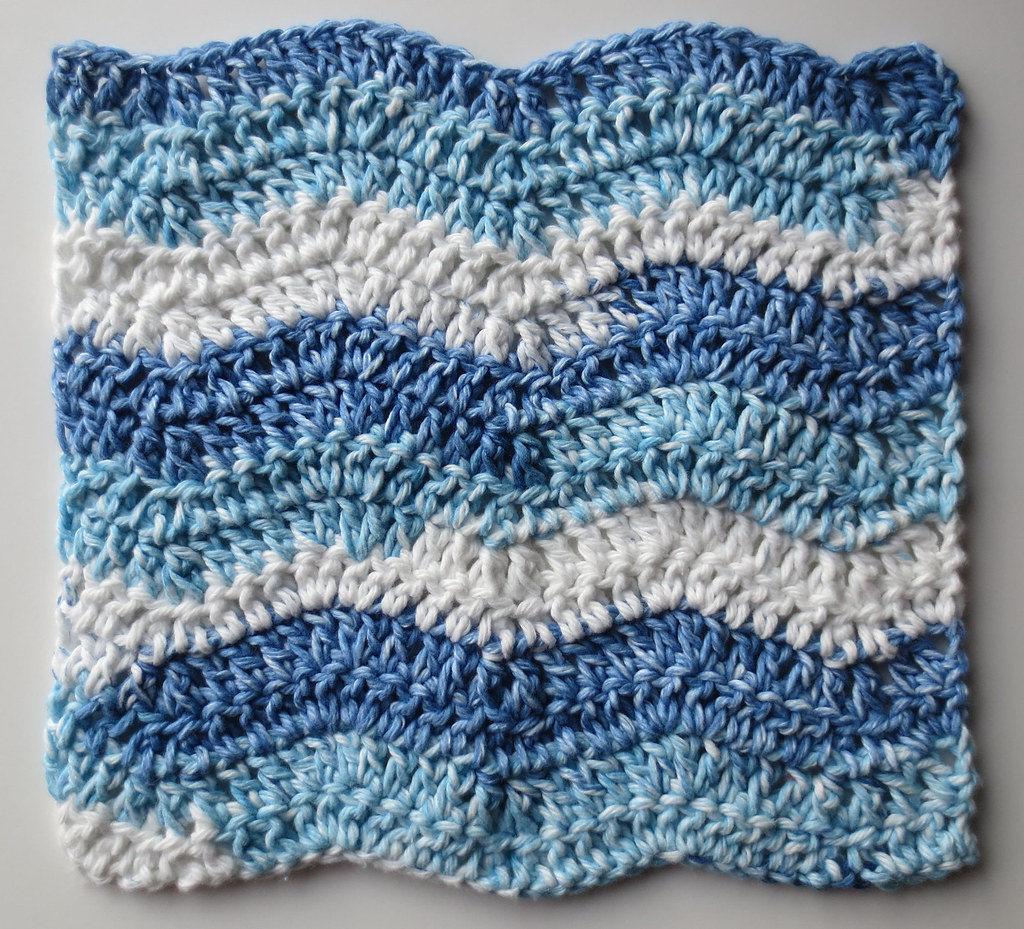
Here is my free crochet pattern for a wavy ripple dishcloth. I first used this wavy ripple style to crochet a lapghan and just love the look of the stitch pattern. So after some trial and errors, I came up with a dishcloth using blue tie-dye cotton Sugar ‘n Cream yarn.
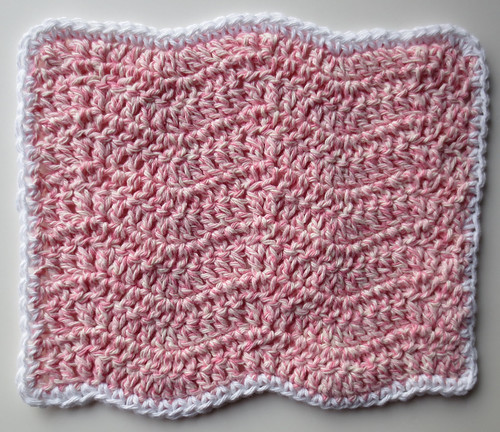
Here is another dishcloth I crocheted using the wavy ripple pattern. I ran out of the pink twist cotton yarn so I only crocheted 13 rows. I added a white edging around the entire dishcloth by working single crochet stitches around evenly. I worked 2 single crochet stitches in the corners. This trim edging gives the dishcloth a little different look and may be useful it you are trying to use up scrap pieces of cotton.
My crochet pattern may be used to make a wavy ripple dishcloth or washcloth. Mix and match colors to create your own unique crocheted cloths.
Free Crocheted Wavy Ripple Dishcloth Pattern
Description: 9-1/2 inches by 9 inches dishcloth
Hook: H (5 mm) crochet hook
Materials: 2 oz ball of cotton yarn such as Sugar n Cream
Ch 36.
Row 1
DC in 3rd st from hook,




Recent Comments