Patterns: Yarn
Patterns in regular yarn: dishcloths, potholders, hats, scarves, baby items, blankets and stockings.
Filter all patterns
·
Sort: Name (A to Z)
Newest first

I crocheted another double layered towel topper which is similar to my pointed handle towel topper. The main difference in this towel topper is that it’s a heavier, more basic pattern for the topper. It has a waffle looking texture to the pattern and so I named it the Waffle Towel Topper pattern.
This towel topper is crocheted using sugar n’cream weight cotton yarn with a G crochet hook. I used a kitchen towel folded in half that requires no cutting or sewing. For more details on how to fold and start a double layered towel topper, see this tutorial link with pictures on how to begin the towel topper.
Crocheted Waffle Kitchen Towel Topper Pattern
Materials needed:
1- Kitchen towel (17 inches wide x 26 inches long used but any size will work)
1-1/2 oz. white Sugar and Cream cotton yarn
1- one inch button
Hooks:
#7 Steel hook
G (4 mm) hook
All directions are in USA terms.
Directions:
Row 1
Fold the towel in half and use the steel crochet hook to poke holes and then Sc evenly along the top edge of towel making the stitches with the G hook.

Here is a new baby hat pattern that features a double post ribbing. These little hats work up very quickly and make wonderful gifts and items for donations. I just recently crocheted these baby hats for our local hospital nursery. They have been requesting more handmade hats for the newborns and I always love a good reason to crochet more baby hats.
Here are a few more crocheted hats with the double post ribbing.
This pattern is a variation of my original ribbed band baby hat. I am going to post the full pattern here for convenience. That way you just have to scroll down to the complete double post baby hat pattern below. For a preemie size hat directions, please refer back to the original pattern as I only posted newborn and 3 month old baby sizes in the pattern below. Also the original pattern includes directions on how to crochet a striped hat using two different colors of yarns.
Double Post Baby Hat Pattern
Finished baby ribbed hat measures:
3-month old = 14 inch circumference by 6 inches long with WW yarn
Newborn = 13″ cir by 5-1/2″ long with WW yarn
Small newborn = 12″ cir by 4.75″ long with DK yarn
Hooks:
H (5 mm) US sized crochet hook for 3-month baby
G (4 mm) US sized crochet hook for newborn
Materials: 1 ounce Worsted Medium Weight or Aran Yarn
Ch 3 and join to form ring. Hat pattern is worked in the round without turning.

Here is a quick crochet pattern for bloomers or panties for a fashion doll. In a recent post, I crocheted a dress for a 14-inch fashion doll. I needed some bloomers for under my doll’s dress and came up with these simple but effective panties for my doll.
The 14-inch fashion doll has a waist of 5 inches and 7 inches around at the hips. The crochet pattern below has bloomers that will fit a 14-inch doll. Then I have listed the changes necessary for a 11-1/2 inch tall Barbie fashion doll that has a 3-1/2 inch waist and 5-1/4 inches around at hips.
These bloomers were designed to cover the doll’s bottom under a dress and aren’t all that fancy. I just wanted a simple quick pattern for some panties and this crochet pattern fits that purpose. The waist maybe a bit loose but its snug enough at the hips to hold the bloomers in place without elastic. I hope you find the free pattern useful and happy crocheting to all.
Crocheted Fashion Doll Bloomers
14″ Fashion Doll Dress – Doll has 5″ around waist and 7″ around at hips
Materials:
Small amount of fingering or sport weight acrylic yarn
Hook: E (3.5 mm) crochet hook
Finished size: 3″ at waist, 3″ long, and 3-1/4″ wide at leg opening bottoms
Rnd 1
Ch 30 and join to form a circle.

I crocheted these felted baby slippers using just a small amount of chunky wool yarn that I had left over from a thrift store purchase. I was inspired by the cute felted woman’s slippers that Guro created. Guro has a new blog site where you can find all kinds of beautiful new craft projects that she has created. I just love all her beautiful crochet projects. Click on over and check out her gorgeous designs.
I wanted to make baby slippers to fit my Granddaughter who is 10 months old. So through trial and error, I finally came up with a pattern that after felting fit her feet.
My finished slippers before felting were 3″ wide by 5″ inches long with a toe depth of 2″. After felting the slippers are 2.5″ wide by 4.25″ long. Guro has graciously allowed me to post my baby version of her slipper pattern below. Enjoy and happy crafting to all!
Felted Baby Wool Slippers
Crochet hook: J (6 mm) crochet hook
Yarn: 2 ozs Bulky/Chunky weight wool yarn
2) small star buttons
Rnd 1
Ch 2, work 6 Sc in 2nd ch from hook. Don’t join as this pattern is worked in rounds without joining.
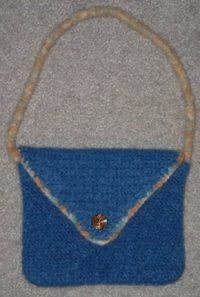
I have simply fell in love with felting bags. Here is my latest bag which is a blue handbag with variegated wool yarn for the flap trim and the strap. I crocheted this handbag using 100% wool and felted it an extra long time as I wanted my final product to be very tight. This easy pattern works up very quickly and makes for a fun felted project.
As always, below is the free bag pattern so you too can create this cute little handbag. Enjoy!
********************************************************************************************
Felted Handbag Pattern
Purse measurements:
Before felting – 10 inches wide and 8 inches long with 48 inch strap
After felting – 7-1/4 inches wide and 6 inches long with 19 inches strap
Materials:
5 ozs -100% blue wool yarn
2 ozs -100% variegated wool yarn for flap edging & strap
3/4″ button for front closure
Hook: Metal G (4 mm) US hook
Chain 40

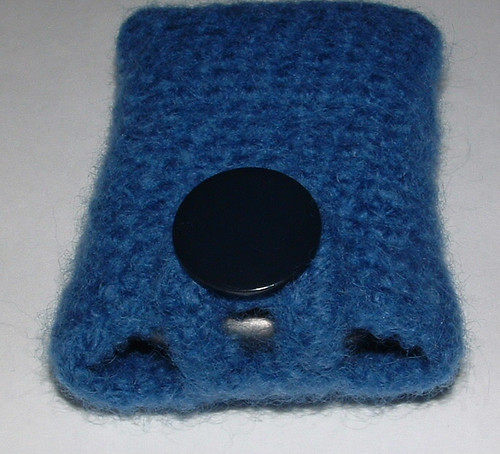
You know if you have been reading this blog site for awhile that I’m all into being practical and creating things I need. So I really wanted to have a nice little cell phone holder and I just love felting so I crocheted myself this little cell phone cozy from some scrap wool yarn.
_______________________________________________________________________________________________
Free Felted Cell Phone Cozy Pattern
Crochet this cozy using about an ounce of 100% wool yarn with a G (4mm) crochet hook. Chain 14, single crochet (sc) in 2nd stitch from hook and in each stitch down to end of chain (13 sc). Working around the back side of chain, sc in each stitch to create a seamless cozy. Do not join. Continue working in rounds until your cozy measures 4-1/2 inches long before felting (approx. 19 rounds.) Slip stitch into last few stitches of final round so your finished edge is smooth. Fasten off and weave under ends on the inside of your cozy. Finished size before felting was 3-1/2 inches wide by 4-1/2 inches long.
Buttonhole Loop:
Join yarn with slip stitch in 5th stitch from edge and ch 15. Attach in the 2nd stitch over from loop base to create the buttonhole with a slip stitch. Then Sc back up the chain evenly (approx. 18 Sc’s.) Join with slip stitch back into the beginning with a slip stitch. Finish off and weave under ends.
Felting:
Place your completed cozy inside an old pillowcase and tie it closed with a knot. I felted my cozy 15-20 minutes on the hottest water. Check your cozy after 10 minutes of agitation to make sure it hasn’t felted too much to fit your cell phone. Mine needed more so I put it back into the washer. After a total of 20 minutes, mine was perfect. I pulled it out and cold water rinsed it in my sink. Shape your cozy so it’s square and check to make sure the opening is wide enough to insert your cell phone. If it’s a bit tight, just stretch the opening a little. Air dry and shape as it dries if needed.
My final felted cozy measures 3 inches wide by 4 nches long which fits my Motorola cell phone that is 2-1/4″ wide by 3-3/4″ long. This cozy is a great way to use up scraps of wool yarn you may have on hand. Just make sure you use 100% wool so your project felts properly.
Once your felting is done and its dry, add a 1 inch or larger button as desired to the front of the cozy. Voila you are done — Enjoy your felted cell phone cozy!

I love felting and here is my latest crocheted tote bag. It is crocheted with 100% wool yarn and then felted on the hottest setting in my washer for about 18 minutes. It really sunk from the original size before felting which was 17″ wide x 18″ long to the finished size of 11″ wide x 12″ long. I added a felted flower to the flap along with a magnetic closure.
Click to super-size any of these photos
Closeup of the tote bottom
Here is a photo of the wide bottom of my tote bag. By adding the increase stitches as you crochet the beginning of bag, the bottom is able to extend and have a flatter surface. After you felt the bag, make sure to form the bottom so it dries in the correct shape so that your tote bag can stand up on the flat bottom. Enjoy the free pattern!
Felted Flower Tote Bag Pattern
Materials needed:
8 ozs Lion Brand Dark Teal 100% Wool Yarn (3 oz skeins)
1.7 ozs Caron Variegated Adobe 100% Wool Yarn
1 Magnetic button closure
Hook: H (5 mm) U.S. size metal hook
Description: Felted Blue Striped Tote Bag with Flower Closure
After felting bag measures 11 inches wide and 12 inches long with 27 inch straps
Directions:
Ch 55
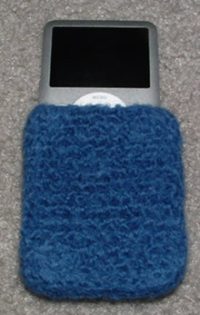
Need a little cozy for your Ipod Nano? Well crochet yourself this quick and easy cozy project!
Free Pattern:
Crochet this cozy using about an ounce of 100% wool yarn with a “G” hook. Chain 13, single crochet (sc) in 2nd stitch from hook and in each stitch down to end of chain (12 sc). Working around the back side of chain, sc in each stitch to create a seamless cozy. Do not join. Continue working in rounds until your cozy measures 3-1/2″ long before felting (approx. 15 rounds.) Slip stitch into last few stitches of final round so your finished edge is smooth. Fasten off and weave under ends on the inside of your cozy. Finished size before felting was 3-1/2″ long by 3-1/4″ wide.
Place your completed cozy inside an old pillowcase and tie it closed with a knot. I felted my cozy 20 minutes on the hottest water I had with an old pair of jeans. Check your cozy after 8-10 minutes of agitation to make sure it hasn’t felted too much. Mine needed more so I put it back into the washer. After a total of 20 minutes, mine was perfect. I pulled it out and cold water rinsed it in my sink. Shape your cozy so it’s square and check to make sure the opening is wide enough to insert your Nano. If it’s a bit tight, just stretch the opening a little. Air dry and shape as it dries if needed.
My final felted cozy measures 2-3/4″ wide by 3-1/8″ long. This cozy is a great way to use up scraps of wool yarn you may have on hand. Just make sure you use 100% wool so your project felts properly.
Here is my cozy with the Ipod Nano inside. It’s soft and thick so it protects the Nano nicely. This frugal project is much better than a store bought cozy plus its handmade!
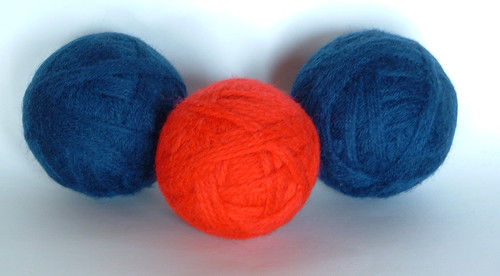
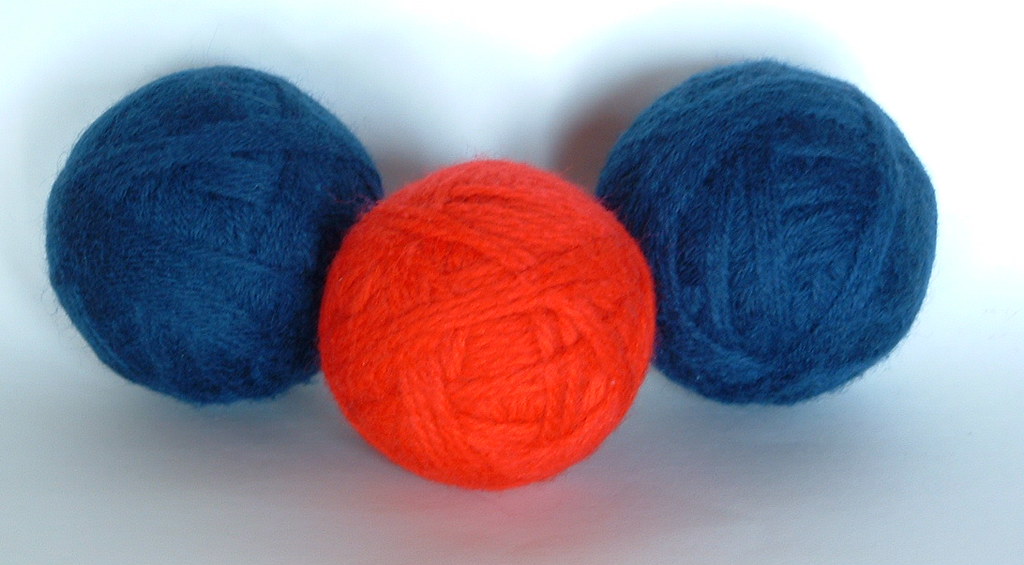
Felting wool into dryer balls is a good alternative to using dryer sheets or adding fabric softener to your wash. Here are three dryer balls I felted and I have been using them now for over a month. I am happy to report that they worked wonderfully. I have no static cling and my clothes are soft after coming out of the dryer.
Apparently the felted wool balls not only help with static cling by moving around the clothes as they dry but it also may help with drying the clothes faster. I can’t say for sure but it seems as though my clothes aren’t taking as long to dry as normal. I am still hanging most of my clothes outside on the line but I have been using the felted dryer balls for our dress clothes in the dryer with great results.
Materials needed per ball:
2 ounces wool (Scrap pieces used)
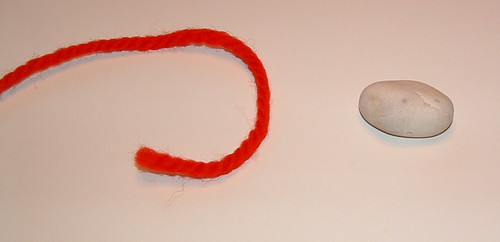
1 small stone – quarter size
First step is to get a small stone about the size of a US quarter. The stone adds weigh and provides a firm base for the dryer ball center.
Just start wrapping wool scraps around the stone.




Recent Comments